
In the event that you cannot access your Unchained vault for any reason, you always have the ability to spend your bitcoin using another wallet application (known as external recovery). Our recommended method is, of course, the open-source tool that we built specifically for this purpose: Caravan. But there are other solutions available, such as Sparrow.
What you’ll need
To recover your funds, you’ll need to prepare the following:
- Your two hardware wallets
- Your multisig configuration file
- Our open-source multisig tool Caravan.
- A PC or Mac with USB ports to connect your hardware wallets
Don't have your multisig configuration file? Read our guide to find out where it is and how to download it from your Unchained dashboard.
How to spend from your vault using Caravan
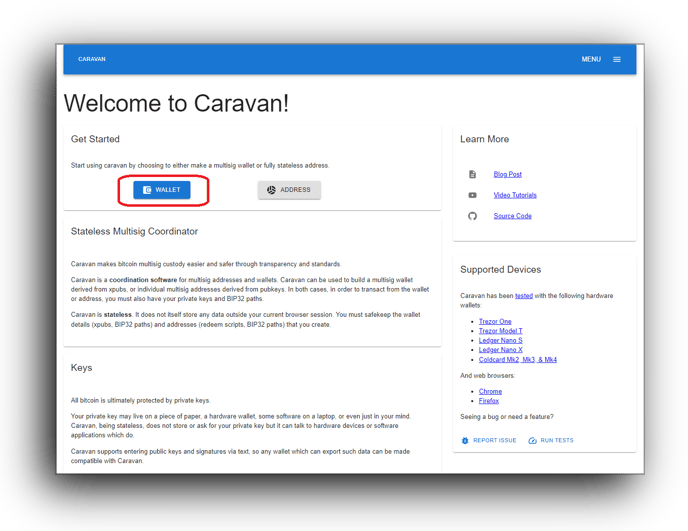
- Navigate to Caravan in Chrome, Brave, or Firefox browser. There's also an easy-to-remember URL that redirects to our GitHub page (which, importantly, operates separate from unchained.com): caravanmultisig.com.
- Where the page shows "Start using caravan by choosing to either make a multisig wallet or fully stateless address", choose Wallet.
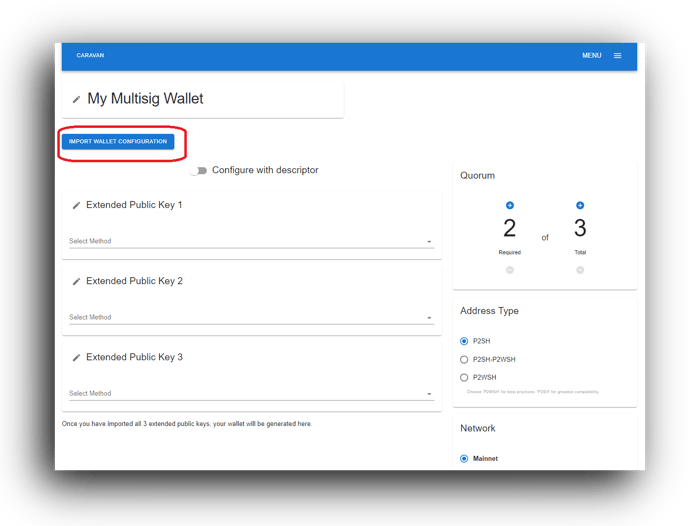
- Select Import Wallet Configuration and upload your multisig configuration file (it should be a .json file). Alternatively, if you are an experienced user, you can also copy and paste the extended public keys from the file you saved directly into Caravan.
- Select which bitcoin client to gather wallet balances from, either Mempool.space or blockstream.info. Experienced users can choose Private to pull details from your own full node if you wish.
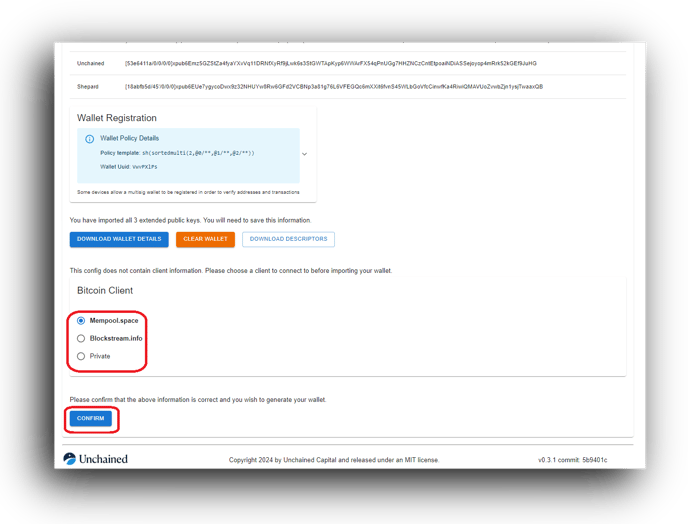
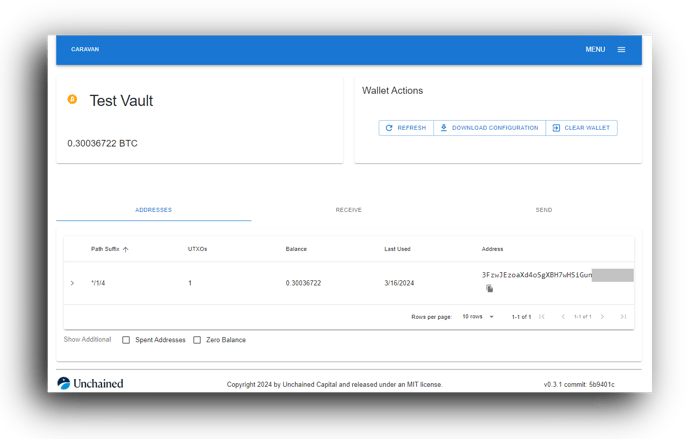
- Click Confirm. Caravan will load your wallet details, including balances and transactions.
- To spend your bitcoin, select Send and paste a receive address (ensure it is a bitcoin address) in the To field.
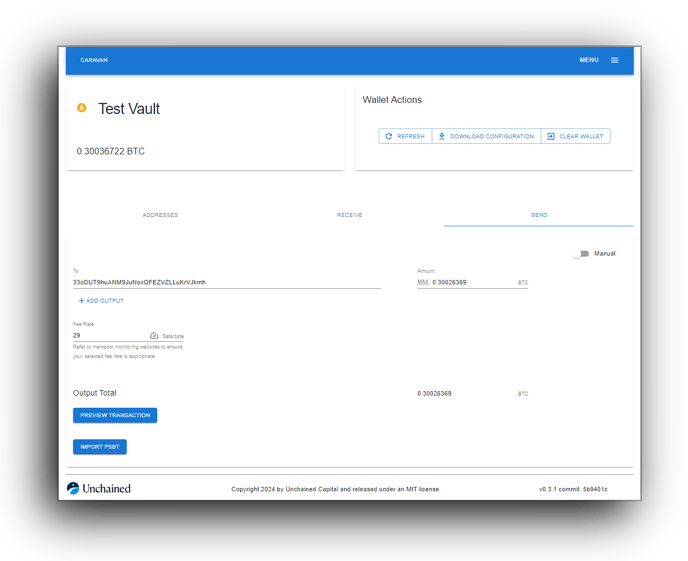
- Double-check that the To address is correct by verifying at least the first and last 6 digits.
- In most cases, you should leave the fee rate at default. Advanced users can customize the fee rate. Learn more about fees.
- Enter the amount you’d like to send (you can click Max to send the maximum amount minus fees), and click Preview Transaction.
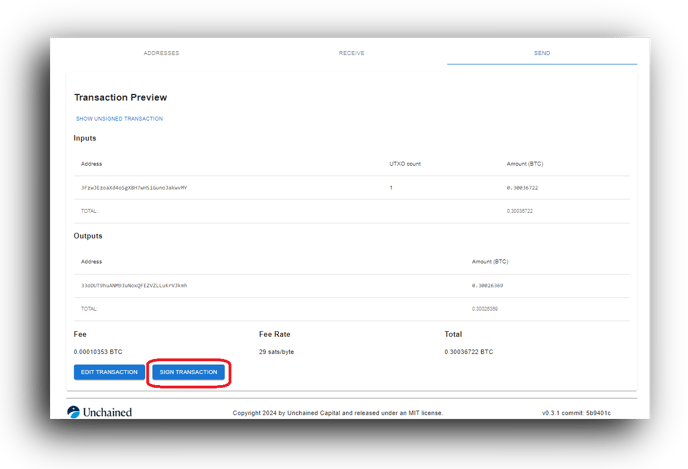
- You'll be shown the full details of the transaction. To move forward, click Sign Transaction. You will need to sign with two keys (hardware hardware wallets). These will be the two hardware wallets that you used to set up your Unchained vault and performed quarterly key checks with.
- Use the drop-down menu to select the key you'd like to sign from.
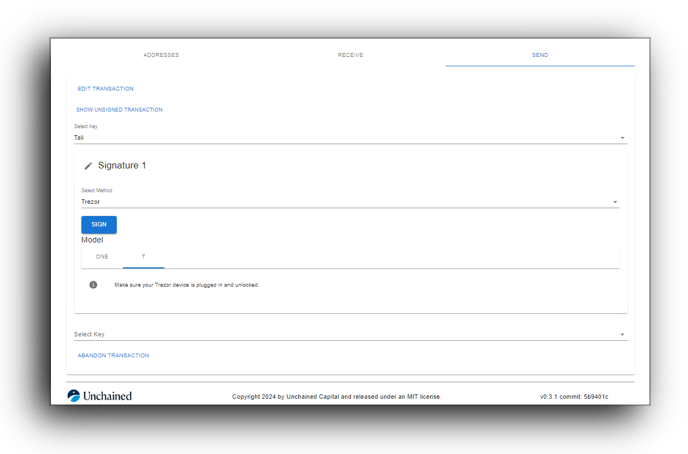
- Connect your hardware wallet to your computer, select the proper model, and click Sign. Ensure the send address is correct on the hardware wallet screen while signing.
- Repeat steps 12 and 13 for the second key.
- Select Broadcast Transaction from Caravan. This will send your transaction to the bitcoin network and cannot be undone, so double-check all details are correct.
- You should be notified that the Transaction successfully broadcast.
That’s it! You should have now completed a transaction from your vault without any interaction with the Unchained platform. You can track the progress of the transaction on a block explorer like mempool.space, by searching for your transaction ID.